CloudFuze has simplified the complexity of managing multiple Dropbox accounts. With CloudFuze move feature, one can now move/copy/transfer files between Dropbox accounts and also can move files between Dropbox and any other cloud storage service.
Prerequisites:
- Two dropbox accounts you own or have access to
- A CloudFuze account with a paid subscription (Limited trial is available)
Step 1: Create a CloudFuze Account
Go to webapp.cloudfuze.com and create your account. If you already have an account, log in to your CloudFuze account.
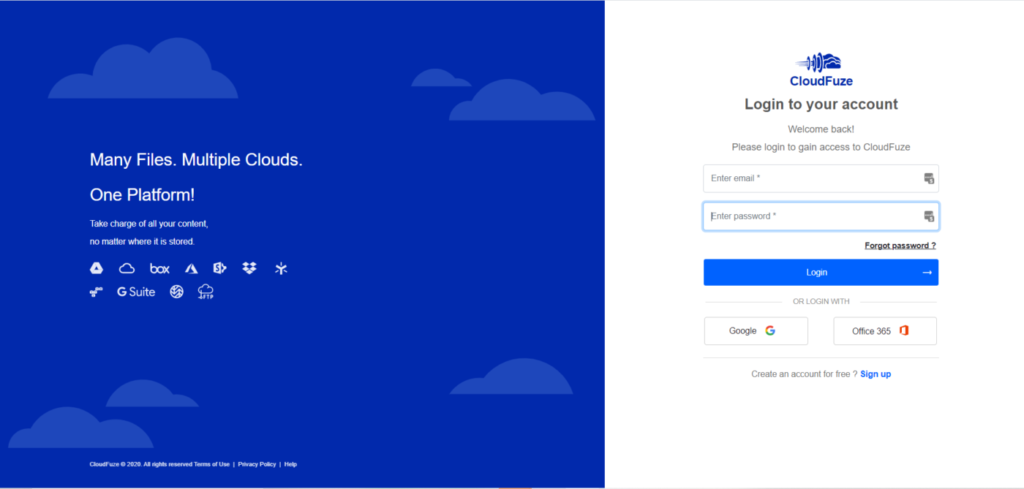
Step 2: Add Your First Dropbox Account
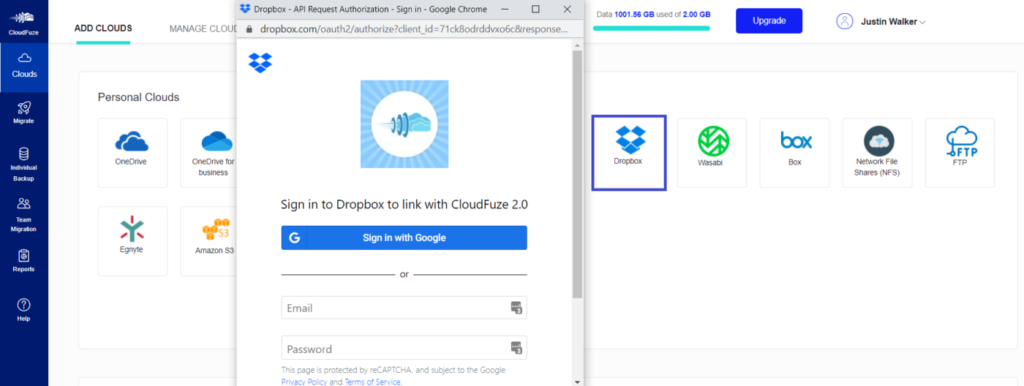
Locate the Dropbox logo under the personal clouds list and click on it. In this step, you are required to add your Dropbox account to the CloudFuze webapp.

Step 3: Enter Your Dropbox Login Credentials
Enter your Dropbox login credentials in the popup and grant access to CloudFuze. CloudFuze requires access to your Dropbox account to migrate the content. Please keep in mind that we don’t store your login information. CloudFuze uses OAuth protocol to access your Dropbox account and the platform will not be able to read your data like a human.
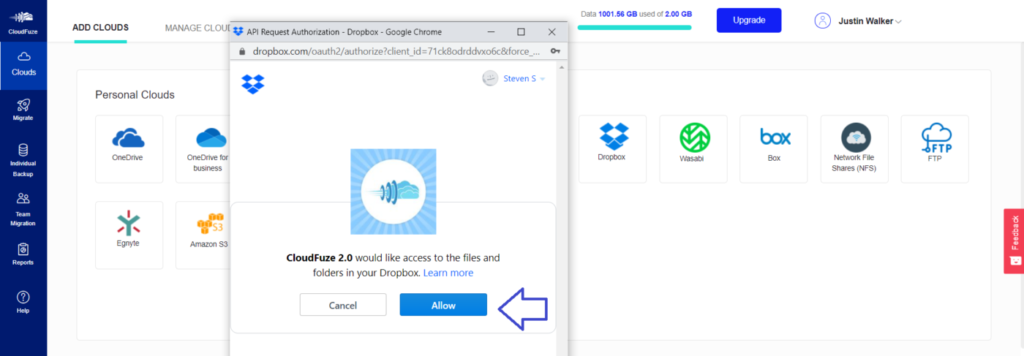
Step 4: Grant Access to CloudFuze
Click on the Allow button to grant access to CloudFuze.
Step 5: Check Whether the Cloud Is Added Successfully
Go to CloudFuze’s clouds section by clicking on the cloud icon on the left-navigation menu. You should be able to see your newly added Dropbox account there. Once you find your Dropbox account listed there, it means the account is ready for migration.

Step 6: Add your second Dropbox Account
Since you are planning to migrate content from one Dropbox account to another Dropbox account, you need to add the second Dropbox account of yours to CloudFuze as well. Follow the same process as when you added the first Dropbox account.

Step 7: Check Whether the Second Cloud Added
Go to the clouds section and check whether the second Dropbox account added successfully.

Step 8: Start the Migration
To start the migration, you need to click on the Migrate icon on the left navigation menu.

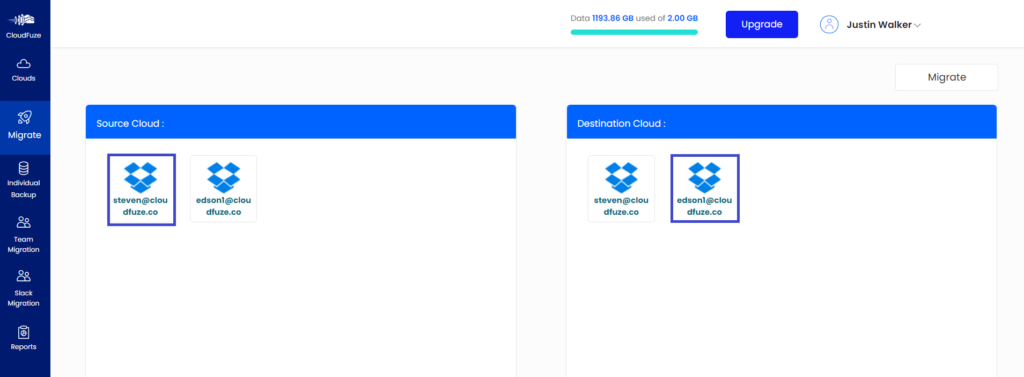
Step 9: Select Your Source and Destination Dropbox Accounts
Choose your source and destination Dropbox accounts carefully. If chosen wrongly, your target cloud’s data will be moved into the source cloud.
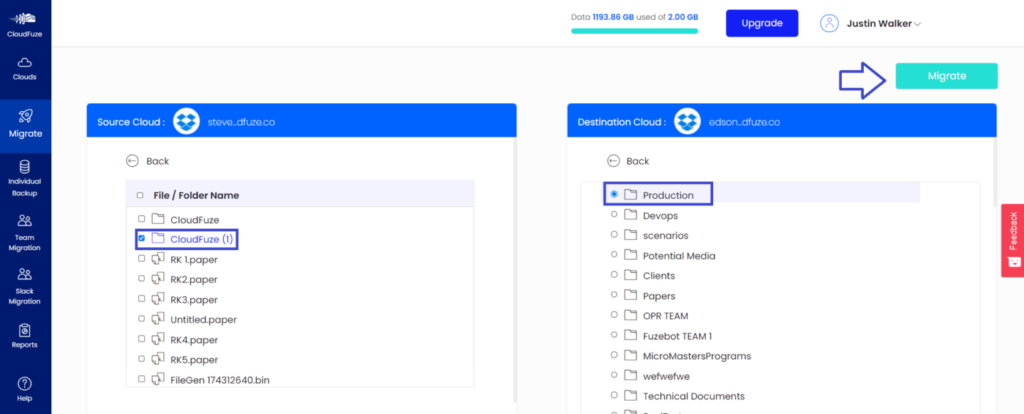
Step 10: Select Content You Want to Migrate
Select files or folders you want to migrate. You can also migrate the entire root folder content.
Step 11: Preview the Migration
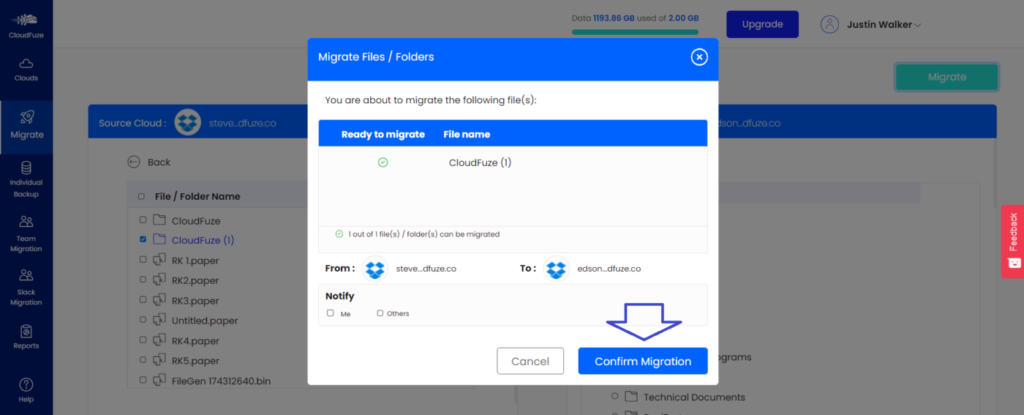
Preview the migration and click on the Confirm Migration button to start the migration.
Step 12: Migration is in Progress
When the status indicates the migration is in progress, it means the file transfer is still taking place. Give it a few minutes or few hours based on the size of the data you are trying to migrate.

Step 13: Migration is Completed
Once the status shows as “Processed”, it means all the files in the source Dropbox account are migrated to the destination Dropbox account.


Leave A Comment