Why to Transfer your Cloud Storage account to another ?
Cloud Storage is the one of the fastest spread technology worldwide used by many , Major cloud storage providers offer different features of cloud storage services for free and paid users. As the advancements adopted by the major cloud storage providers attracts users to switch from one cloud service to another, well that’s not an easy task.
The traditional process to transfer files between cloud storage services
One has to download all the files and re-upload the same to another cloud storage service, it’s very difficult for users with large data and huge numbers of files. Cloud Storage has become an essential online document room for everyone and many of the users store the data in a well-organized manner.
It is challenging to keep the same file and folder structure when you move data to the cloud, making it difficult to access the data within the new cloud service.
CloudFuze is the best solution for cloud-to-cloud transfer if you are looking to transfer files between cloud storage services without losing the native root structure of your file system.
How to Transfer files from One Cloud to another with out loosing file structure
CloudFuze offers file migration services from one cloud to another with file selection option which lets you select files and folders that you want to transfer. Not only that you can select the desired destination folder to transfer all your files to another cloud storage service. This way your files are well organized as stored in the previous cloud storage service.
This new functionality brings many new use cases to the CloudFuze platform:
- Have you changed storage services such that you now need to migrate files from one cloud storage service to another?
- Do you have files in multiple cloud storage services that you sometimes need to move around because you work with different projects or contacts in different places?
- Do you manage your files in a multi-cloud storage environment and need to move files to stay under your allowed storage limits?
- Are you just sick of having to go through the arduous process of logging into a cloud service, downloading or emailing a file, logging into another service and then uploading the file just to move files from one place to another?
Regardless of your specific use case, CloudFuze offers multi-cloud storage management from a single, universal platform. CloudFuze offers this across all of your devices for a single monthly cost. And now CloudFuze offers simple, single screen ability to move or migrate files from one cloud storage service to another.
You can see the steps in this process below, and/or if you are not already a CloudFuze customer, you can sign up for a free 30-day trial HERE.
Step by Step instructions to transfer to cloud using CloudFuze are as follows:
Step 1: Log in and add storage clouds/services if you have not already then start “Move”
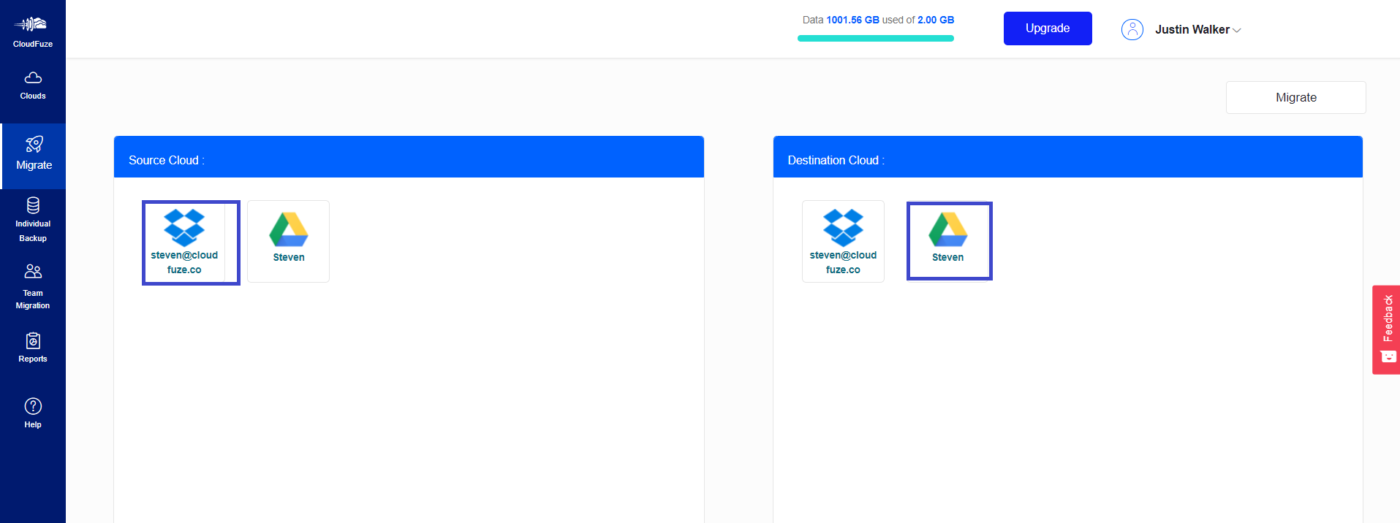
After logging into CloudFuze and setting up clouds using the “Add Cloud” button, click on “Move” in the left bottom corner of the screen on the web app.

Step 2: Select “Source Cloud” The Cloud Storage account from where you want to transfer files from
You will then be taken to a page where you can manage all of the files in the different storage services that you have added to CloudFuze. On the left is the “Source Cloud” where you can select a storage service to move files from.
On the right is the “Destination Cloud” where you can select a storage service to move files to. (See the picture below.) Select the “Source Cloud” from which you wish to move files.

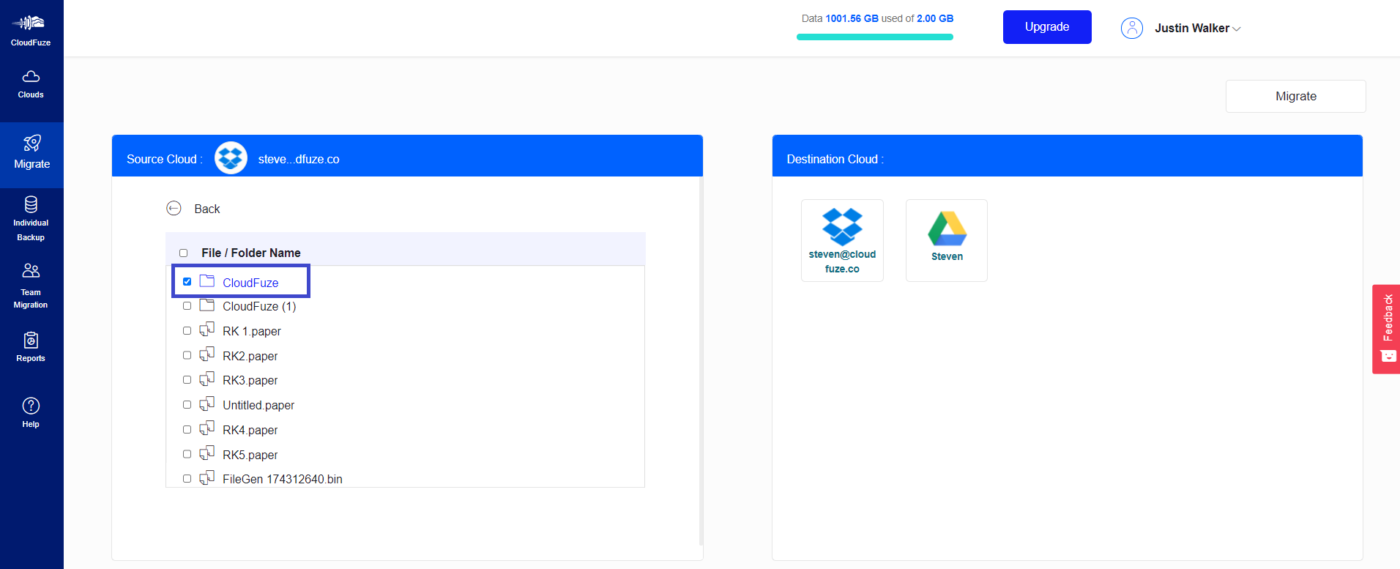
Step 3: Select files or folders – Select the folders and files on your desired structure
Next choose the individual files or folders from within the “Source Cloud” that you wish to move.

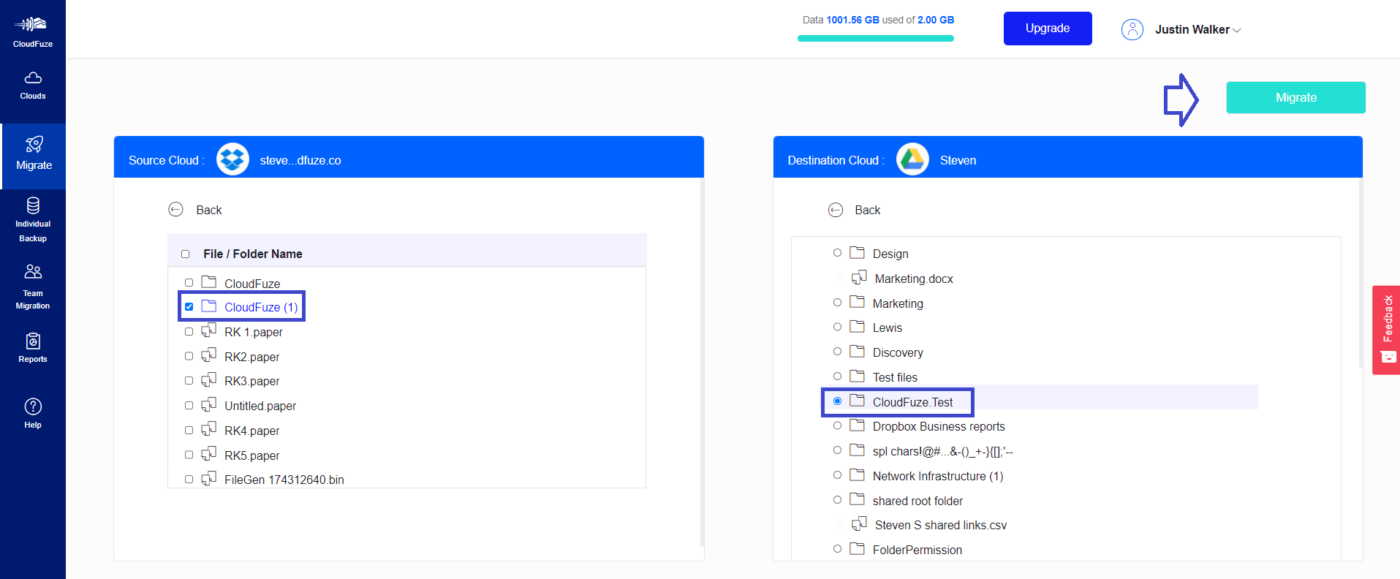
Step 4: Select the “Destination Cloud” The Cloud Storage Account where your are transferring data to
Finally, select the “Destination Cloud” and folder location to which you would like to move that file, and then click “Move” in the bottom right corner of the screen.

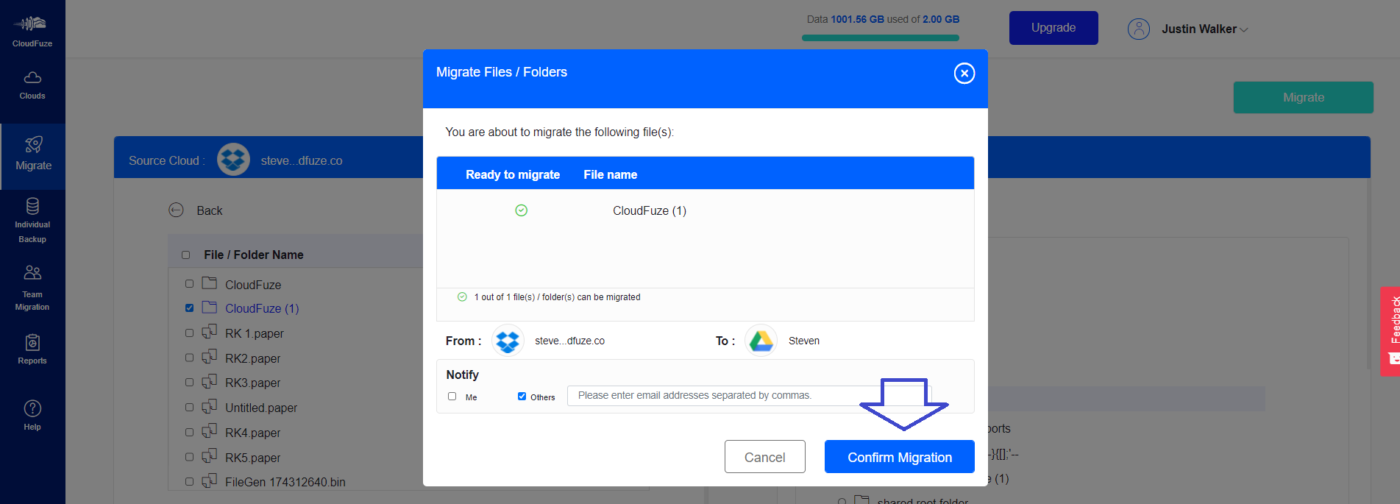
Step 5: Check and confirm the transaction
You will then be presented with a confirmation screen with details of the transaction including files to be moved and the “Source” and “Destination” storage services.
Below the transaction details, you can have transaction completion notifications sent to yourself and also others. You also can choose to keep the source files on the original storage service. (If so, you will now have copies of the files in both storage services.)
After checking the transaction for accuracy, click “Confirm Move” in the bottom right corner of the screen to complete the transaction.
You can see the status on move transactions that are scheduled for your account.


If you have selected notify option you will receive an email once after the move is complete.


Leave A Comment